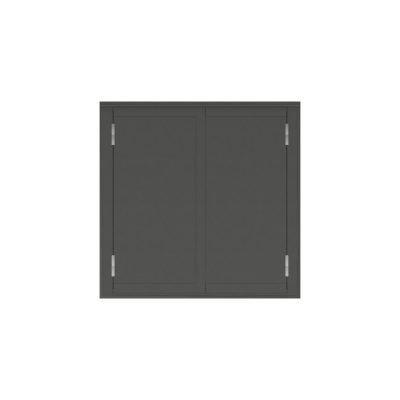
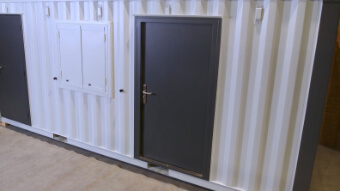
How to install a container personnel door
Our installation instructions will show you how to carry out installation of your shipping container door ready for the container to be repainted and finished on site.
View our accompanying video or follow the instructions below to complete your container window shutter installation.

Total Time Needed :
2
Hours
50
Minutes
Required Tools:
Materials Needed:
Steps to install a container door:

Safety First
When installing a container door you should always:
– Consider your surroundings and wear the appropriate PPE
– We recommend a minimum of 2 people to install. Container doors & shutters are heavy
– Ensure that your welding set us properly earthed prior to any welding taking place

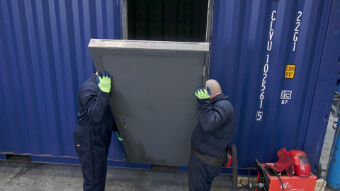
Step 1
Measure where you are going to install your steel door and grind off two points directly underneath; this is to remove the paint and give you bare metal to weld the box section supports to. In our install, we tack weld 2 support plates to rest the box section goal post frame in place for the next stages and we highly recommend this additional step to avoid having to hold the goal post up by hand.
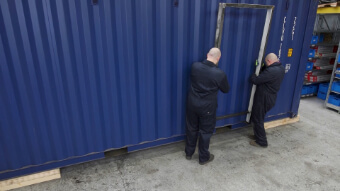
Step 2
Position the goal post frame next to the container where you are going to fit your door. The goal post frames are typically fabricated from a 50mmx100mm box section and the door frame is installed within this.
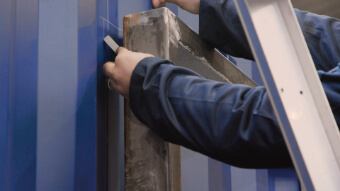
Step 3
Draw around the perimeter of the goal post frame with chalk keeping the aperture line as small as possible, leaving no more than a 2mm gap around the frame. If you draw this too big, you will struggle to weld the box section frame into this opening.
WARNING: Do not be tempted to weld the door frame directly into the container side. The box section goal post frame adds rigidity to the container side and prevents deformation.
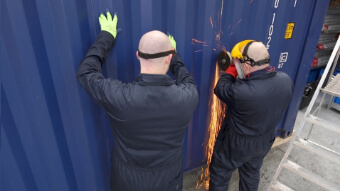
Step 4
Remove the 2 support brackets, then cut the hole into the container side with a hand grinder using the chalk line as a guide.

Step 5
As you are coming to the end of cutting your aperture, ensure someone is supporting the loose sheet of metal so it can be pushed to fall away from you once complete. Then, tidy up the opening using a linishing pad.


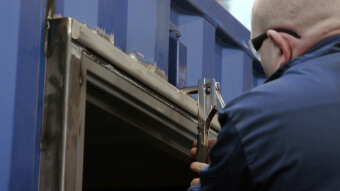
Step 7
Tack weld it into position ensuring it is square and plumb, using a spirit level. We recommend you weld fully across the top, a 100mm weld down each side and a 25-30mm stitch weld every 250-300mm for the remainder.

Step 8
Weld a door sill into opening at this stage, if you are choosing to use one. The door frame will sit on top of this.

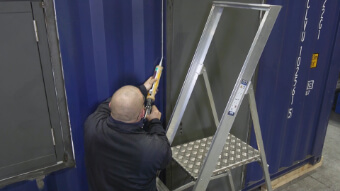
Step 10
Tack weld the frame into position ensuring it is square and plumb by using a spirit level on all faces.
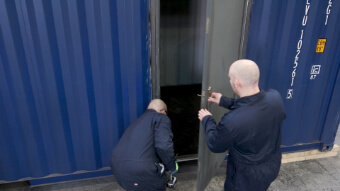
Step 11
Open the door using the loose handle and spindle (do not fix the handle at this stage) and open the door to 90 degrees.

Step 12
Using tek screws, fix the door frame into the opening. Start with the hinge side and the move onto the latching side.
WARNING: it is crucial at this stage to check that the door opens, closes and locks freely without catching. If you need to adjust or manipulate the door frame, you will need to cut the tack welds and move the frame position, then re-fix using the tek screws AT THIS STAGE.
Step 13
In our installation, we fit a rain deflector above the door that is fixed to the top of the goal post frame. You may choose to install an alternative version that slots in between the head of the frame and the goal post. An off-the-shelf rain deflector would also do.
It is especially important to install this for anti-vandal steel doors with the surface welded flange, to prevent water ingress.

Step 14
Fit the Hooply lever handles and euro cylinder to the door, then finally the v-seal to the door frame.
PLEASE NOTE: We recommend waiting until the door is painted before installing hardware and the seal. In our video we install these onto the primed door for demonstration purposes only.
Step 15
Finish the door install by sealing the joins between the stitch welds of the goal post frame, the door frame, sill and rain deflector at the top with silicone.

Step 16
Shipping containers are typically fully wet sprayed using a single or two pack paint. Our shipping container doors are primed so that they can be painted at the point of a full container re-spray, or masked up and painted locally in the install area.
It is acceptable to paint over the locks and hinges, but only for 1 coat. Once 2 or more coats are applied to the hinges and locks, they can become sticky and less reliable. We recommend masking up if the paint is thick.
See our other guide for advice on how to install an anti-vandal container window shutter and shipping container window.
Featured Products
-
 Steel Goal Post FrameFrom £144.00 inc. VAT
 -
Anti Vandal Window ShuttersFrom £171.00 inc. VAT